
Forget those expensive bottles of fertilizer! It’s time to take charge of your hydroponic garden by making your own custom nutrient solutions. It might sound fancy, but it’s surprisingly simple and can save you money in the long run. Plus, you get to decide exactly what goes into your plants’ food.
Think of yourself as a plant nutrition expert! With a few basic ingredients and a little knowledge, you’ll be mixing up fertilizer recipes that unlock your plants’ full potential. Get ready for healthy growth, vibrant colors, and bountiful harvests.
Let’s dive into the world of DIY hydroponic fertilizer! We’ll guide you through the whole process, from sourcing ingredients to mixing up that perfect nutrient solution.
What are hydroponic nutrients and why do you need them
Imagine your plants are little athletes training for the growth Olympics! Just like athletes need a balanced diet, your hydroponic plants need special nutrients to reach their full potential. Unlike plants in soil, which can scavenge for food, hydroponic plants depend on you to be their super-chef.
Hydroponic nutrients are like a power-packed smoothie for your plants. They contain all the goodies your plants need to grow strong, produce vibrant leaves, and maybe even give you a tastier harvest. So, think of those nutrients as a key ingredient for a thriving hydroponic garden!
What is NPK and Why is it Essential for Hydroponics
NPK stands for Nitrogen (N), Phosphorus (P), and Potassium (K), the three building blocks of plant nutrition. Think of nitrogen as the fuel for lush, green leaves and strong stems. Phosphorus is the champion of root growth and abundant flowering or fruiting. And potassium is the all-around plant health superstar, boosting resilience and overall vigor.
In traditional gardening, plants might scavenge some NPK from the soil, but in hydroponics, they’re entirely reliant on you! NPK fertilizers provide a way to precisely deliver these critical nutrients directly to your plants’ roots. This gives you total control over their diet, allowing you to tailor the balance of nutrients to their specific needs and growth stage. A healthy dose of NPK is the secret to unlocking strong, vibrant, and productive hydroponic plants!

Why Make Your Own Hydroponic Fertilizer?
Picture this: instead of simply buying bottles of premixed nutrient solution, you have the power to create a custom blend tailored to your plants’ exact needs. That’s the allure of DIY hydroponic fertilizer! Sure, it takes a bit more effort at first, but the potential benefits are exciting.
Let’s break down the advantages:
Cost Savings: For larger systems or long-term growing, sourcing your ingredients and mixing fertilizer can be significantly cheaper than relying solely on commercial blends.
Customization: You’re the chef! Adjust the NPK ratio to match your plants’ specific requirements and growth stages. Leafy greens might love extra nitrogen, while flowering plants crave a phosphorus boost.
Ingredient Control: Know exactly what’s nourishing your plants. This is especially important for organic growers or those concerned about specific nutrient sources.
Deeper Understanding: By researching ingredients and calculations, you’ll gain valuable knowledge about hydroponics and plant nutrition in general.

Of course, it’s not all perfect. Here’s the honest truth:
Upfront Effort: DIY fertilizer requires research and a bit of math. You’ll need to source ingredients, understand ratios, and set up a mixing process.
Room for Error: Mistakes in measuring or choosing the wrong ingredients can harm your plants. Accuracy matters!
Ingredient Storage: You’ll need space to safely store the various fertilizer components.
The Verdict: While DIY hydroponic fertilizer might not be the perfect solution for everyone, the potential for savings, customization, and greater control makes it a compelling option for many growers.
Medium Farmstand Bundle – $599.00
from: Lettuce Grow by TFP
Interested in giving it a try? Let’s dive into the essential ingredients you’ll need to make your own fertilizer.
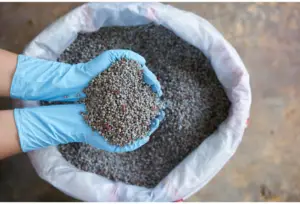
Essential Ingredients for DIY NPK
To create a well-balanced NPK fertilizer, you’ll need individual sources of Nitrogen (N), Phosphorus (P), and Potassium (K). Here are the most common options:
Nitrogen (N) Sources
Calcium Nitrate: A popular choice, providing both nitrogen and a bit of calcium (beneficial for many plants).
Potassium Nitrate: Gives you a dose of nitrogen and potassium in one ingredient.
Urea: Highly concentrated nitrogen source, but use cautiously as it can alter pH over time.
Phosphorus (P) Sources
Potassium Phosphate (Monopotassium Phosphate): A soluble and easily absorbed form of phosphorus.
Potassium (K) Sources
Potassium Nitrate: We met this one already – it’s your two-for-one N and K source!
Potassium Sulfate: Good option if you need potassium without additional nitrogen.
Potassium Chloride (Muriate of Potash): Provides the most concentrated dose of potassium but use sparingly as excess chloride can harm some plants.
Important Notes on Ingredients
Purity: Choose hydroponic-grade or food-grade ingredients to minimize impurities that could mess with your nutrient solution.
Availability: Check online retailers, hydroponics stores, or even agricultural suppliers for the best sources.
Beyond NPK: The Importance of Chelated Micronutrients
While NPK are the stars, plants also need trace amounts of other elements like iron, zinc, copper, etc. These micronutrients are best provided in “chelated” form. Chelates help to keep the micronutrients soluble and readily available to your plants in hydroponic solutions. Look for chelated micronutrient mixes specifically designed for hydroponics.

Next Up: The Math!
Calculating Your Perfect NPK Ratio (Detailed Edition)
Understanding NPK ratios unlocks the potential to fine-tune your DIY fertilizer. While it might seem a bit daunting at first, let’s break it down into manageable steps:
Step 1: Know Your Plants and Their Stage
Research: What are the ideal nutrient needs of your specific crops? Leafy greens crave nitrogen, while fruiting plants require more phosphorus.
Growth Stage: Nutrient needs can change. Seedlings might prefer a gentler mix, while flowering plants often need an extra nutrient boost.
Step 2: Find a Starting Point
Beginner-Friendly Recipes: Hydroponics stores or reputable websites often provide basic recipes for common plants (lettuce, tomatoes, etc.). These give you a solid foundation.
Online Calculators: Tools like this one https://scienceinhydroponics.com/2016/03/the-first-free-hydroponic-nutrient-calculator-program-o.html streamline the math. Input your desired NPK ratio, target volume, and the calculator tells you how much of each ingredient to use.
Ask the Experts: Tap into the knowledge of online hydroponics communities or experienced growers at your local hydroponics store.
Step 3: Customize and Experiment
Observe Your Plants: They’re the ultimate judge! Signs like lush growth, vibrant colors, or abundant fruiting indicate you’re on the right track. Yellowing, stunted growth, or lack of flowers might mean it’s time to adjust the ratio.
Record Your Recipes: Keep track of what you mix and how your plants respond. This makes refining your fertilizer easier over time.
Start Simple, Then Tweak: Don’t overcomplicate things, especially at first. Use a basic recipe, observe, and then adjust gradually as needed.
Important Considerations
Water Quality: Your water’s initial pH and any existing minerals might slightly affect your calculations. Test your water source!
Mixing Small Batches: Perfect your recipes with smaller amounts before creating large batches of fertilizer.
As an example:
Let’s do a step-by-step walkthrough using the hydroponic nutrient calculator to illustrate how to calculate your DIY fertilizer mix.
Scenario: You’re growing lettuce in a Deep Water Culture system and want to create a nutrient solution optimized for the leafy growth stage.
Step 1: Determine Your Target NPK
Research suggests leafy greens thrive on a higher nitrogen ratio. Let’s aim for a 2-1-2 (N-P-K).
Step 2: Access the Calculator
Step 3: Input Your Data
Desired Solution Volume: How many liters/gallons do you want to make? Let’s say 5 gallons.
Units: Choose your preferred measurement (grams are common for smaller batches).
Target EC: This is beyond our scope now, start with 1.2. Advanced growers can adjust later.
Target N-P-K: Input 2-1-2 as our desired ratio.
Step 4: Choose Your Ingredients
The calculator has drop-down menus. For this example, let’s use:
Calcium Nitrate (for Nitrogen and some Calcium)
Potassium Nitrate (for extra Nitrogen and Potassium)
Potassium Phosphate (for Phosphorus)
Step 5: Get Your Results!
Hit “Calculate,” and the calculator tells you exactly how many grams of each ingredient to add to your 5 gallons of water to achieve your 2-1-2 ratio.
Step 6: Adjust and Observe
Start with the calculator’s recipe. Pay close attention to how your lettuce responds.
Over time, you might tweak the amounts slightly to find the absolute perfect mix for your specific setup and plants.
Additional Notes
This calculator doesn’t include micronutrients. You’ll need a separate chelated mix.
Always dissolve ingredients ONE AT A TIME to prevent unwanted reactions.
Double-check your numbers before mixing!
Section 4: DIY Fertilizer Mixing – The Play-by-Play
Alright, you’ve got your recipe, your ingredients are lined up, and you’re ready to channel your inner potion master! Before we dive in, let’s make sure we’re playing it safe:
Gear Up: Gloves are a good idea, especially if you’ve got sensitive skin. Glasses are a must if you’re dealing with any powdery ingredients. And hey, if you find a funky lab coat in the back of your closet, why not rock it?
Breathe Easy: Make sure you’re mixing things up in a space with decent airflow.
Labels are your Friend: Don’t be that person squinting at mystery containers. Label everything!
Okay, now for the fun part. Grab these essentials:
The Scale: Not for judging how your day is going – for getting those ingredient amounts just right.
Your Buckets: Clean ones, please! You’ll need one for mixing and one for storing your finished fertilizer.
Water: Room temp is best, no one likes shocking their ingredients with an ice bath.
pH Wizardry Tools: Your trusty pH meter and anything you use to adjust pH up or down.
The Magic Mix: A spoon, a swizzle stick, whatever works to get those nutrients swirling.
Let’s do this step-by-step:
Water Works: Start by filling your mixing bucket with clean water.
Ingredient Tango: Time for the star nutrients (your calcium nitrate, etc.) to take the stage! But remember the golden rule: add them ONE AT A TIME. Wait for one to fully dissolve before adding the next. Think of it as teaching them a fancy dance, you don’t want everyone bumping into each other.
Micro Boost: Your chelated micronutrients come in for the finishing touch. Follow the instructions on the bottle carefully.
pH Perfection: Grab that pH meter – most of your plant pals will like things slightly acidic (between 5.5 – 6.5), but it’s always good to double-check the ideal range for your specific crop. Adjust if needed!
Swirl it Up: Give that solution a good, final stir. Make sure everything is nicely blended.
Storing Your Masterpiece
Darkness is its Friend: No sunlight for this potion! An opaque container keeps algae at bay.
Cool and Calm: Find a spot that’s not blazing hot or freezing cold.
Time Stamp: Slap a label on with the date you mixed it.
Extra Pointers:
Baby Batches: Especially at first, start with smaller amounts. It’s less heartbreaking if you goof up.
Clean Freak: Dirty buckets = bad news. Rinse everything well between uses.
Stay Vigilant: Keep tabs on your nutrient solution, testing pH and EC regularly.
Troubleshooting and FAQs
Even the most experienced DIY fertilizer mixers have those “oops” moments. Don’t worry, your plants (and your sanity) will probably survive! Let’s look at some common issues:
My plants look droopy/yellow/just plain weird! This is where your plant detective skills come in. Nutrient imbalances often show up in specific ways. A quick online search for “[plant type] + nutrient deficiency” can reveal a lot. Test your solution’s pH and EC too, as this affects how well your plants take up nutrients.
My fertilizer has clumps or won’t dissolve. Some ingredients are trickier than others. Make sure your water is room temperature and never add a new ingredient until the previous one is fully dissolved. If in doubt, contact the supplier of your ingredients for advice.
I think I messed up the calculations. It happens! The best solution is to dilute your fertilizer (add more plain water), test the EC to gauge the strength, and then cautiously add more nutrients if needed. Always better to start a bit weak than too strong.
How often should I test my nutrient solution? Aim for at least once a week. Fast-growing plants or systems with smaller reservoirs might need more frequent checks.
Is there a point where DIY isn’t worth it? Honesty time: If you have a huge setup, lots of high-maintenance plants, or zero time for tinkering, pre-made fertilizers offer convenience. But for many growers, the learning and potential savings of DIY are totally worth it!
The Joy of DIY Fertilizer
Crafting your own hydroponic fertilizer is an adventure! Yes, there might be a few hiccups along the way, but that’s part of the fun. Think of yourself as a plant nutrition chef, learning to whip up the perfect recipe for your specific hydroponic garden.
Remember these key things:
Start Simple: Basic recipes are your friend, especially at first.
Observe and Adjust: Your plants are the best guide to whether your fertilizer is on point.
Celebrate the Wins: That moment when you see your plants thriving because of your DIY nutrient solution is incredibly rewarding!
So, are you ready to embrace your inner hydroponic potion master? Let us know in the comments if you have any success stories (or funny mishaps) from your DIY fertilizer journeys!